

- Configure your environment.
- Create an application that retrieves context and calls an LLM.
- Enable tracing to capture both the retrieval step and the LLM call.
- View the resulting traces in the LangSmith UI.
Prerequisites
Before you begin, make sure you have:- A LangSmith account: Sign up or log in at smith.langchain.com.
- A LangSmith API key: Follow the Create an API key guide.
- An OpenAI API key: Generate this from the OpenAI dashboard.
1. Create a directory and install dependencies
In your terminal, create a directory for your project and install the dependencies in your environment:2. Set up environment variables
Set the following environment variables:LANGSMITH_TRACINGLANGSMITH_API_KEYOPENAI_API_KEY(or your LLM provider’s API key)- (optional)
LANGSMITH_WORKSPACE_ID: If your LangSmith API key is linked to multiple workspaces, set this variable to specify which workspace to use.
3. Define your application
You can use the example app code outlined in this step to instrument a RAG application. Or, you can use your own application code that includes an LLM call. This is a minimal RAG app that uses the OpenAI SDK directly without any LangSmith tracing added yet. It has three main parts:- Retriever function: Simulates document retrieval that always returns the same string.
- OpenAI client: Instantiates a plain OpenAI client to send a chat completion request.
- RAG function: Combines the retrieved documents with the user’s question to form a system prompt, calls the
chat.completions.create()endpoint withgpt-4o-mini, and returns the assistant’s response.
app.py or app.ts):
4. Trace LLM calls
To start, you’ll trace all your OpenAI calls. LangSmith provides wrappers:- Python:
wrap_openai - TypeScript:
wrapOpenAI
-
Include the highlighted lines in your app file:
-
Call your application:
You’ll receive the following output:
- In the LangSmith UI, navigate to the default Tracing Project for your workspace (or the workspace you specified in Step 2). You’ll see the OpenAI call you just instrumented.
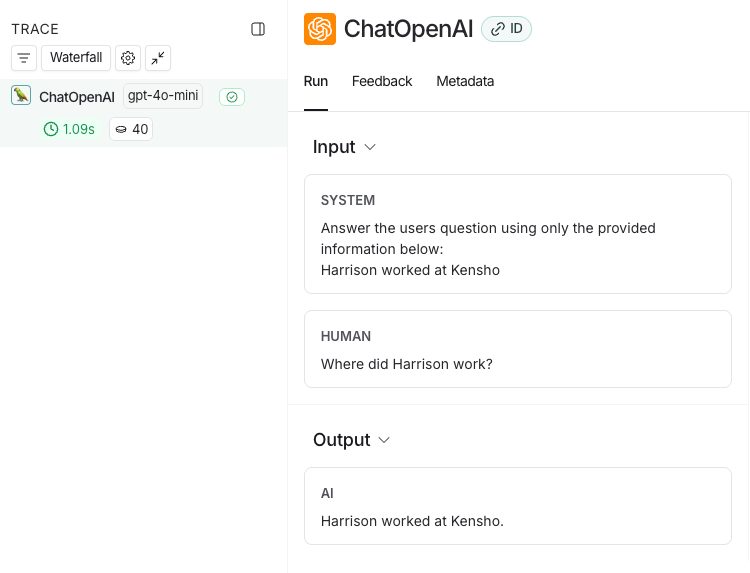
5. Trace an entire application
You can also use thetraceable decorator for Python or TypeScript to trace your entire application instead of just the LLM calls.
-
Include the highlighted code in your app file:
-
Call the application again to create a run:
- Return to the LangSmith UI, navigate to the default Tracing Project for your workspace (or the workspace you specified in Step 2). You’ll find a trace of the entire app pipeline with the rag step and the ChatOpenAI LLM call.
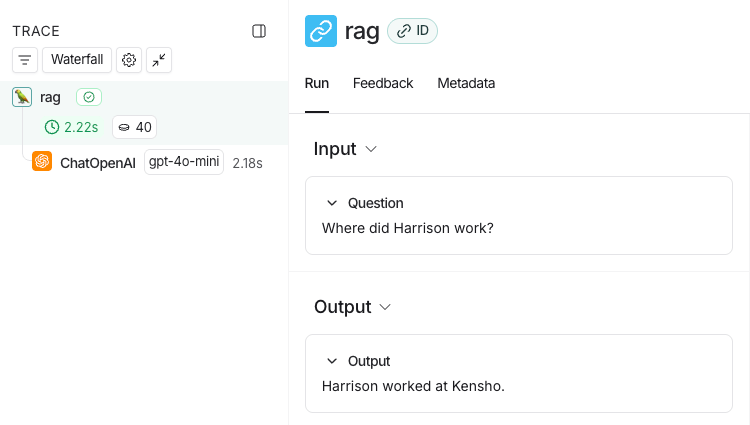
Next steps
Here are some topics you might want to explore next:- Tracing integrations provide support for various LLM providers and agent frameworks.
- Filtering traces can help you effectively navigate and analyze data in tracing projects that contain a significant amount of data.
- Trace a RAG application is a full tutorial, which adds observability to an application from development through to production.
- Sending traces to a specific project changes the destination project of your traces.